|
ND5T PROJECTS |
|
Home Radio Station |
|
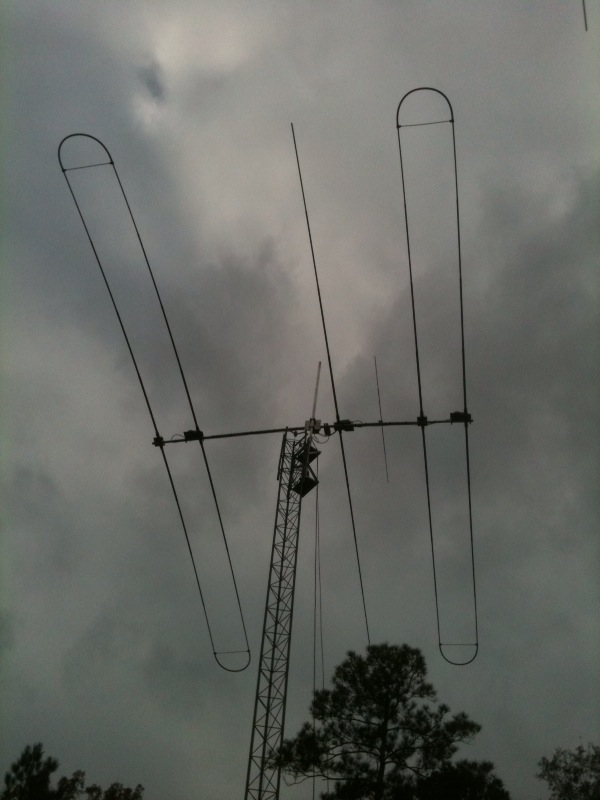
ND5T "Tiny" Tower Install My "Tiny" Tower (when compared to the the big boys like K5MV) will be a 38', Telescoping/Tilt tower. I will be installing a Tri-beam antenna provided by Stu (K5STU), a 2m beam, 70cm beam, and a multi-fan dipole all built by Clyde (N5IF). The tower will have a Yaeus G-800SA Rotator and controller for turning all the beams. Clyde (N5IF) and I started Saturday morning with the plan to install the tower base at my home. We used my Skid loader with a 12" auger and dug down about 4.5' with multiple holes. We then cleaned up the hole with a shovel and estimated we had close to a 1 yard hole. As this is a small 8” triangulated tower this would be more than enough concrete. I had previously built a tilting base plate which Clyde and I welded to a 6” square tubing about 51” long. We then added several pieces of angle iron to the post about 12” long for added support into the concrete. We put this in the hole and poured in the concrete. When we got close to the top we added a 34” square 2x4 frame to make the top look good, and filled in with additional concrete and let her sit. Sunday morning I put the tower on the base and everything looked good. I had to cut the corners off the pieces on the tower as they were hanging on the welds of the bottom plate tabs. The only issue I have is the bolts I used to attach the tower to the base plate have too much slop which allows the tower to be move around when it is standing up. I will replace these as soon as I find the right bolts. I replaced the winch with a new braking winch as the existing one would not hold the weight of the top section when cranked up. I then installed a 24” crown section from Rohn 25 (provided by Buck W5EAT) onto the top rotator mount to serve as a guide to handle the weight when the tower is laid over. 10/24 - Went to K5STU and took down the Tri-Beam and started the install at my QTH. Finished Sunday installing the beam, raised the tower to about 30 degrees to check SWR's and all looked OK. As the CQ contest was going on I went to 15m and keyed the mic and made a contact in the Caribbean on the first try. I shut down and tested the rotator, and stood the tower up to full vertical. I then cranked up the tower and ended up working the contest for a couple of hours and made contacts in 18 countrys including the French Polnesia. 11/1 - I added 2m and 70cm quagi's built by Clyde (N5IF) to the top of the tower. The boom on the 2M is a 1" conduit so I added a 1" sched 40 PVC pipe to the mast, I then took a PVC 1" "X" and grinded out the inside so the 1" mast would slide straight through the X without stopping and set the height I wanted on the mast and put a screw through the X into the Pipe. I took the 3/4" T on the 440 Quagi into a 1" T on the Mast (I didn't have a coupling) and tied the antenna's into a duplexer with a single run to the shack. I tested the antenna's and could hit the Livingston repeater with 5W, from 40 miles away, the Trinity repeater is about 50 miles away and I could hit it with 10 watts, so to say the least I am very happy with my set up.
73's
|
|
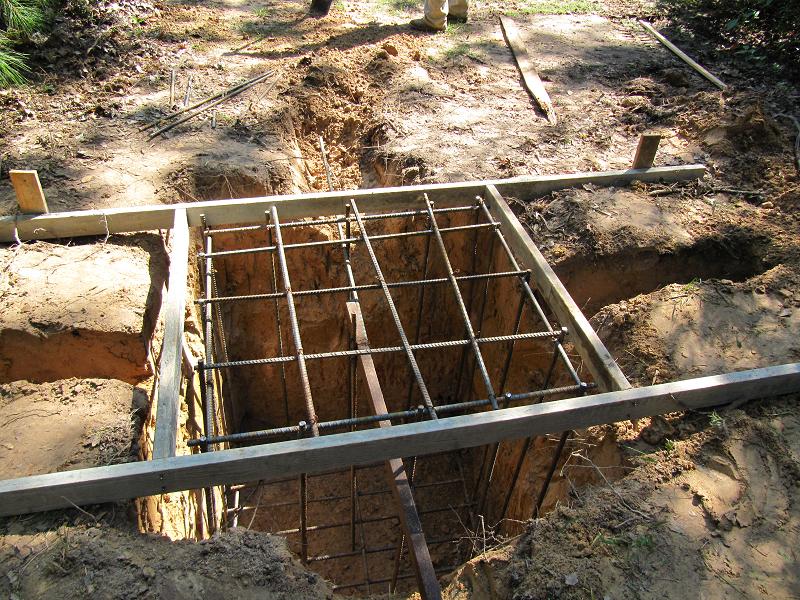
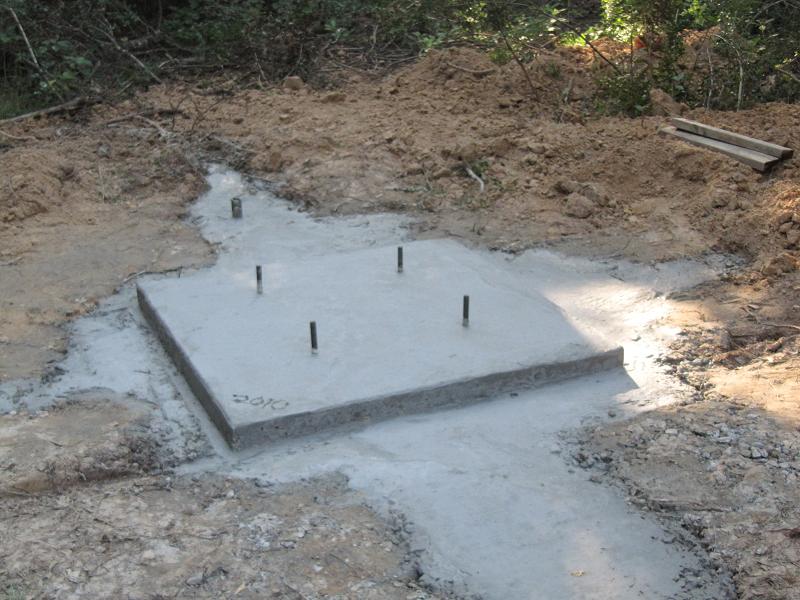
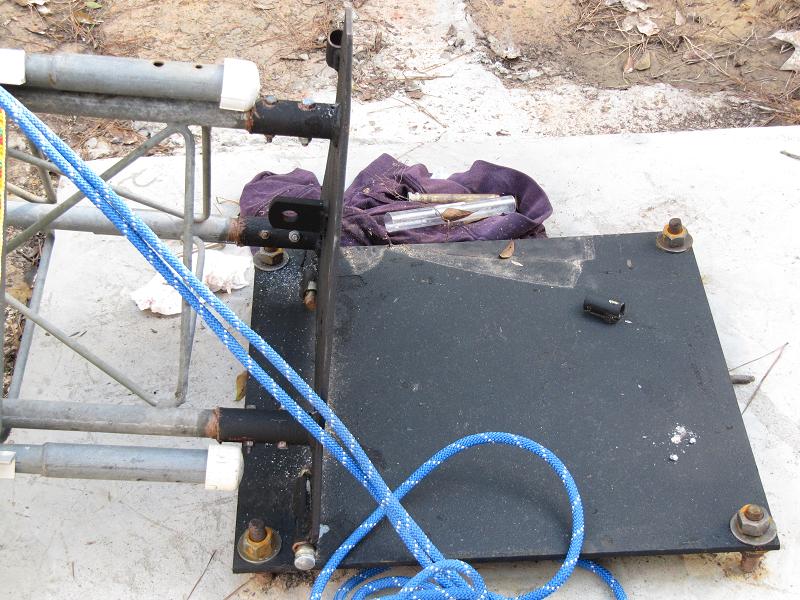
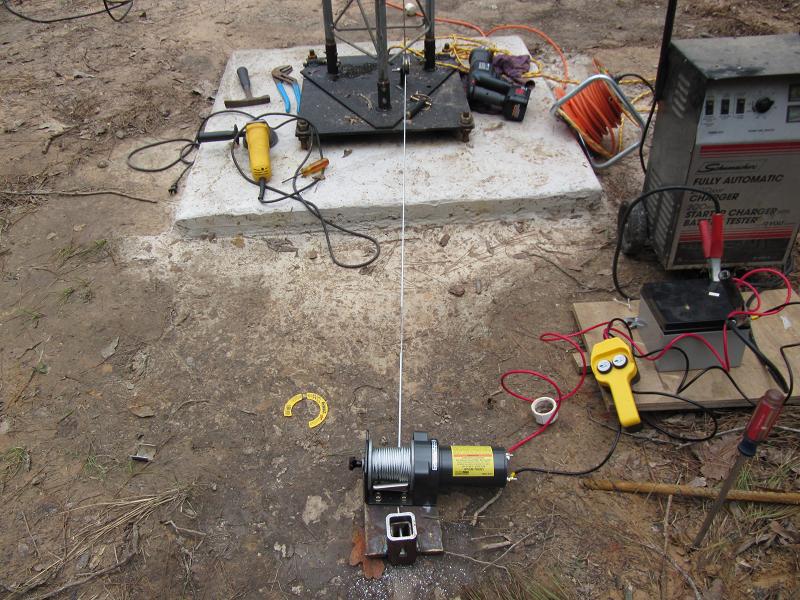
ND5T STATION UPGRADE PROJECT TOWER BASE, because of the hole ending up bigger than planned, the base is 5.25 yards of concrete with 3/4" rods throughout. I put beams going straight out from each side about 4' long 12" deep and 12" wide, this is to help with stability (I hope) as the tower will not have guy's. I also added 1" square tubing on one of the beams to hold an electric winch that will be used to raise and lower the tower and Hazer, (man, am I getting lazy). The area around the base of the tower had too many trees, I hired some help and we took off about 40 trees to make room for the SteppIR.
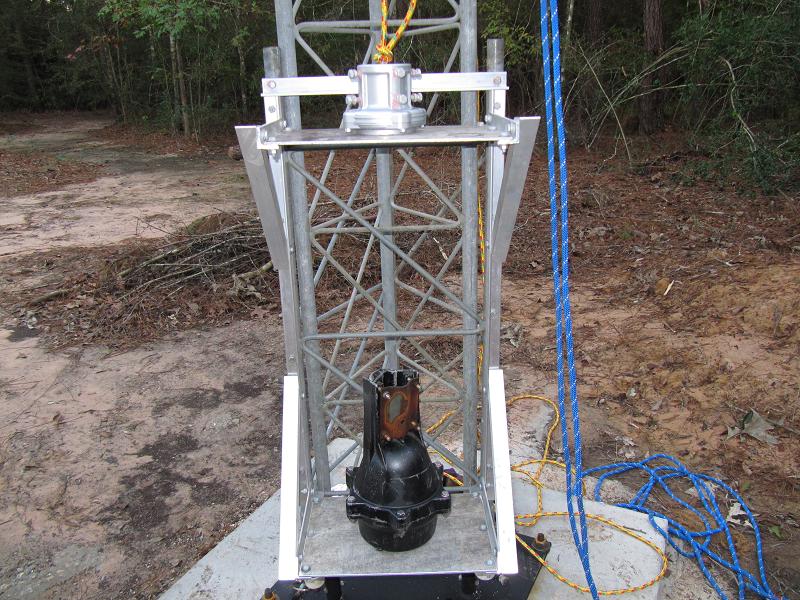
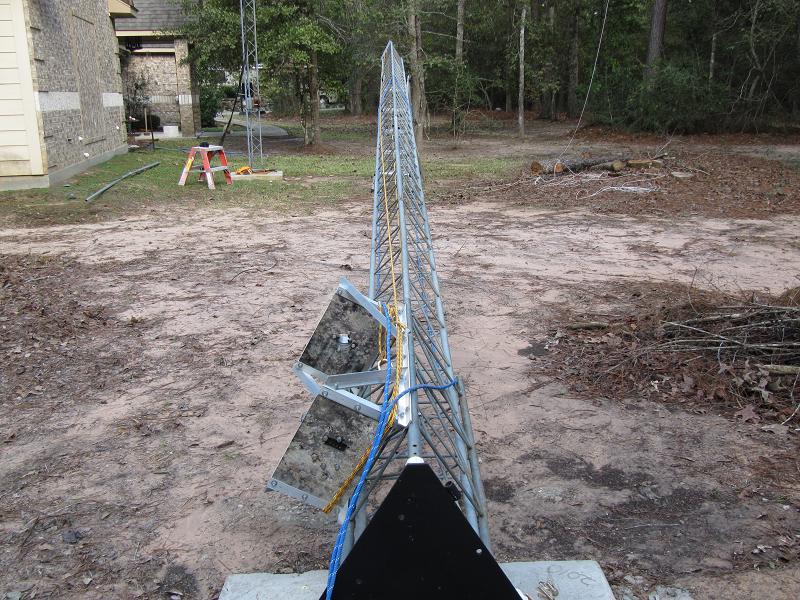
HAZER 2.0 I built Jesse's new hazer, we call this Hazer 2.0 as I used aluminum instead of steel for the support arms as in Jeff's Hazer 1.0. Jesse had some aluminum plate and he had them cut to size for the thrust bearing and rotator supports. I decided to go ahead and build my Hazer and worked on it some during the week. On Hazer 1.0 we ran the cable that pulls up the hazer to the bottom plate that holds the Rotator. Because this plate is aluminum I am going to tie the cable to one of the cross piece's on the tower. I do not want to bend the plate if the Hazer hangs on a bolt going up. the only change to the 2.0model is the addition of a 12vdc winch, so this will be known as the 2.1 model. Please Note we are no longer supporting Hazer 1.0 Rotator: I hooked up the Tail Twister 2 provided by Jesse, for a test and discovered the Indicator did not work, after reading on the internet about the horrors of losing the bearings inside I opened up the case and fixed the problem (dirty terminals). I also discovered that the grease in the rotator was getting dry so I removed the bearings and cleaned them with diesel. Buck W5EAT donated some great grease (and a bottom section for the tower), so I put this new grease in the rotator and all looks good. Antenna building: The SteppIR is not an easy antenna to put together due all the pieces, and trying to level the EHU housing on the boom, since the boom is round getting everything level takes a lot of back and forth. After the boom, the next assembly item is the straight fiberglass telescoping sections, this is not hard just takes a lot of taping to seal the joints. Next comes putting the taped sections together to form the trombone, again not hard just takes time. The antenna is finished and ready for the tower
Tilt Plate: Jesse and I both decided to go with a tilt plate so that we would never have to climb our towers. The tilt plate will be used for initial construction, and doing maintenance on the tower or pulleys on down the road. Al N5WWS donated a bottom plate for Rohn 45 to me. Since the Rohn 45 and 35 use the same pipe legs, all I had to do was cut off the support pipes and re-weld them for Rohn 35 pattern. I then welded a tab in the center for the bottom pulley for the Hazer. Jesse ordered us bolts on the internet so all the pieces are ready for the install
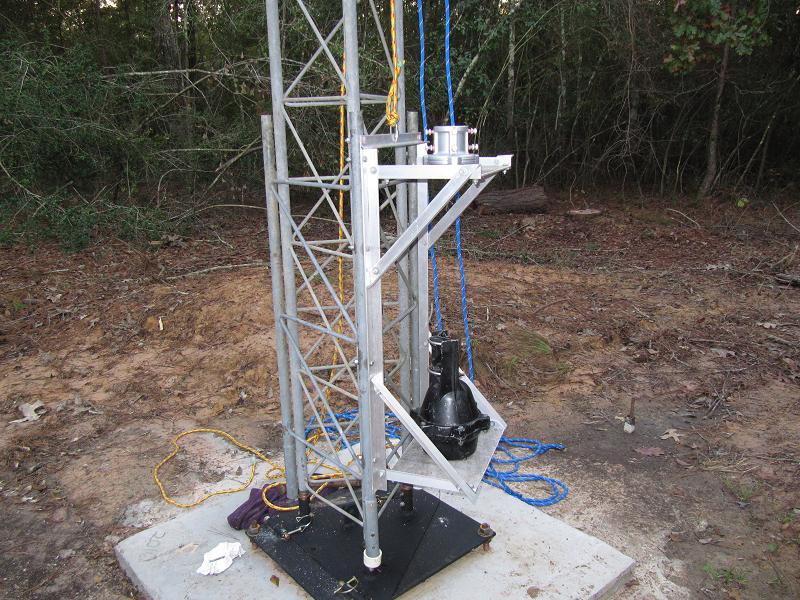
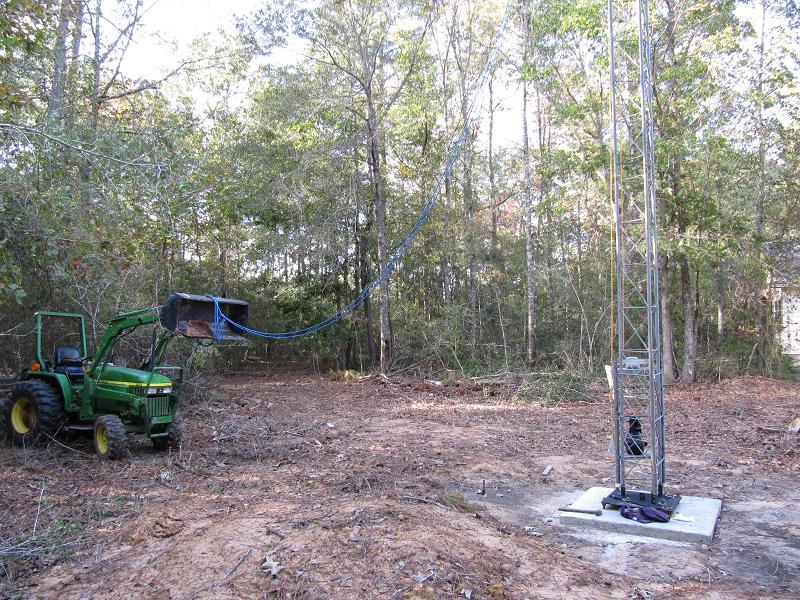
Tower Installation: The tower can be erected with no help due to the tilt plate. So I got the tower bolted together in one day. I took a lot of time using anti seize on the sections and bolts so the tower will come apart later. The Hazer was slid over the top of the tower and all was left was the top section. The next weekend I added the top section and the hazer support pulley, and pulled the ropes through (i will replace with cable when I mount the winch). I installed the raising ropes about 2/3rd's of the way up and pulled the tower up with the tractor. Man am I happy.....
Antenna Installation: Putting the antenna boom on the hazer by yourself is another matter. I had to climb up the tower to the top of the mast boom and install a pulley to pull up the boom and hold it while I got the bolts installed, once the boom was mounted, putting the fiberglass elements on was a snap. The antenna is installed so now I need a winch
Hazer testing: The Hazer was put on the tower prior to raising so next I had to mount the winch to the square tubing that I had installed in the tower base concrete. I took an oversize square tubing and welded a plate for holding the winch. The 2" square tubing slips over the existing tubing in the concrete and then I installed a pin to hold it all together. Next I tried to raise the Hazer with the winch and discovered a couple of issues with caps I had installed on the Hazer trying to get it to slip over the bolts on the tower. After removing those, I cut a slit in the Hazer legs and bent the tubing out about 30 degrees to slide over the bolts. The hazer took a couple of trips up and down the tower and everything look good.
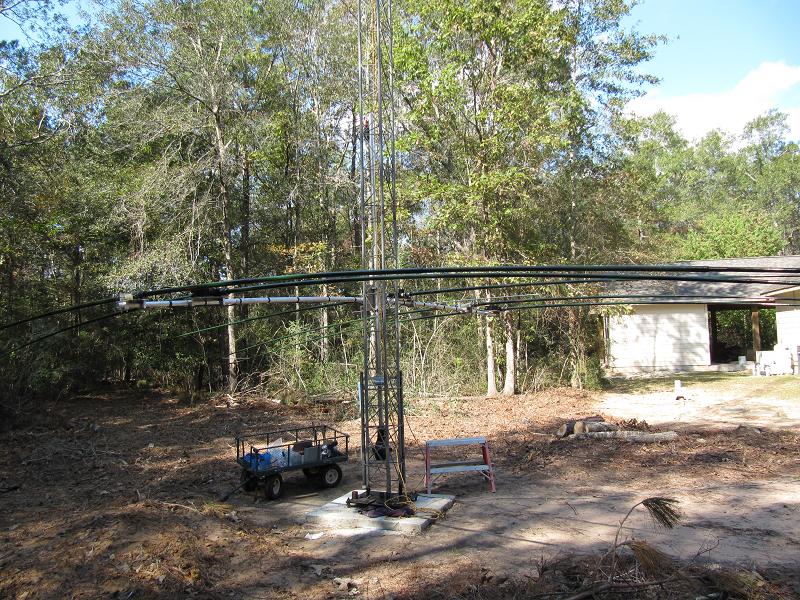
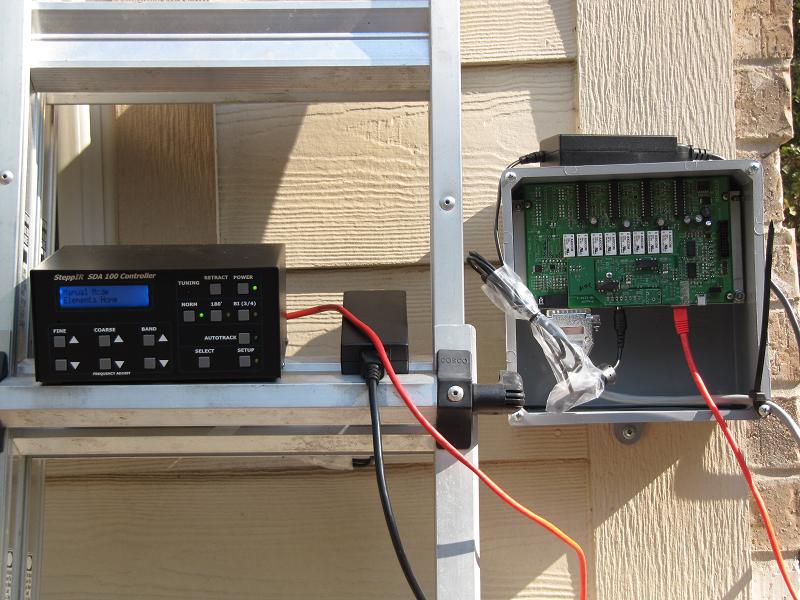
Wiring: I next installed about 125' of RG 213 to feed the antenna, and installed new 8c rotor cable to the TT2. During the installation of the boom pieces I had installed the 25c cable that controls all the motors and switchers on the hazer. Next I ran all these to a convenient area next to the house and started testing the wiring, Jeff K5MV helped me test all the functions and to do some initial SWR readings on the SteppIR antenna. Some of the measurements did not look good but that is one of the great things about the SteppIR, you can adjust all the element lengths from the control console. Since everything was functioning, it was time to shut down and move everything into my shack.
Testing the SteppIR. As I said the initial reading on some of the bands did not look very good 2.4 on 6m, 3.2 on 30m the rest was generally under 2.0. I started adjusting the antenna and got all the bands down to 1.2 SWR and under (most were 1.1). My first DX contact with the new antenna was with KC4AAA in Antarctica on 20m. The great thing about this contact was I had forgot to turn the amp to operate, so I made the contact with 50 watts in a pileup. Playing with the antenna a little I made 2 contacts with ZL8X Kermadec Island (15 and 20m), 2 contacts with Suriname (15, 17m), ZL7VR Chatham Is (15m), and TC3WFF in Turkey on 40m, Man I love this antenna
|
|
|